Secret Detection (FREE)
- In GitLab 13.1, Secret Detection was split from the SAST configuration into its own CI/CD template. If you're using GitLab 13.0 or earlier and SAST is enabled, then Secret Detection is already enabled.
- Moved from GitLab Ultimate to GitLab Free in 13.3.
- In GitLab 14.0, Secret Detection jobs
secret_detection_default_branchandsecret_detectionwere consolidated into one job,secret_detection.
People may accidentally commit secrets (such as keys, passwords, and API tokens) to remote Git repositories.
Anyone with access to the repository could use the secrets for malicious purposes. Exposed secrets must be considered compromised and be replaced, which can be costly.
To help prevent secrets from being committed to a Git repository, you can use Secret Detection to scan your repository for secrets. Scanning is language and framework agnostic, but does not support scanning binary files.
Secret Detection uses an analyzer containing the Gitleaks
tool to scan the repository for secrets. Detection occurs in the secret-detection job. The results
are saved as a
Secret Detection report artifact
that you can later download and analyze. Due to implementation limitations, we always take the
latest Secret Detection artifact available.
GitLab SaaS supports post-processing hooks, so you can take action when a secret is found. For more information, see Post-processing and revocation.
All identified secrets are reported in the:
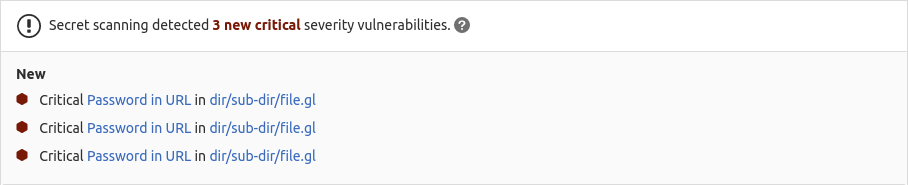
Detected secrets
Secret Detection uses a default ruleset containing more than 90 secret detection patterns. You can also customize the secret detection patterns using custom rulesets. If you want to contribute rulesets for "well-identifiable" secrets, follow the steps detailed in the community contributions guidelines.
Features per tier
Different features are available in different GitLab tiers.
| Capability | In Free & Premium | In Ultimate |
|---|---|---|
| Configure Secret Detection scanner | {check-circle} Yes | {check-circle} Yes |
| Customize Secret Detection settings | {check-circle} Yes | {check-circle} Yes |
| Download JSON Report | {check-circle} Yes | {check-circle} Yes |
| Check text for potential secrets before it's posted | {check-circle} Yes | {check-circle} Yes |
| See new findings in the merge request widget | {dotted-circle} No | {check-circle} Yes |
| View identified secrets in the pipelines' Security tab | {dotted-circle} No | {check-circle} Yes |
| Manage vulnerabilities | {dotted-circle} No | {check-circle} Yes |
| Access the Security Dashboard | {dotted-circle} No | {check-circle} Yes |
| Customize Secret Detection rulesets | {dotted-circle} No | {check-circle} Yes |
Coverage
Secret Detection scans different aspects of your code, depending on the situation. For all methods except "Default branch", Secret Detection scans commits, not the working tree. For example, Secret Detection can detect if a secret was added in one commit and removed in a later commit.
-
Historical scan
If the
SECRET_DETECTION_HISTORIC_SCANvariable is set, the content of all branches is scanned. Before scanning the repository's content, Secret Detection runs the commandgit fetch --allto fetch the content of all branches. -
Commit range
If the
SECRET_DETECTION_LOG_OPTSvariable is set, the secrets analyzer fetches the entire history of the branch or reference the pipeline is being run for. Secret Detection then runs, scanning the commit range specified. -
Default branch
When Secret Detection is run on the default branch, the Git repository is treated as a plain folder. Only the contents of the repository at the current HEAD are scanned. Commit history is not scanned.
-
Push event
On a push event, Secret Detection determines what commit range to scan, given the information available in the runner. To determine the commit range, the variables
CI_COMMIT_SHAandCI_COMMIT_BEFORE_SHAare important.-
CI_COMMIT_SHAis the commit at HEAD for a given branch. This variable is always set for push events. -
CI_COMMIT_BEFORE_SHAis set in most cases. However, it is not set for the first push event on a new branch, nor for merge pipelines. Because of this, Secret Detection can't be guaranteed when multiple commits are committed to a new branch.
-
-
Merge request
In a merge request, Secret Detection scans every commit made on the source branch. To use this feature, you must use the
latestSecret Detection template, as it supports merge request pipelines.
Templates
Secret Detection default configuration is defined in CI/CD templates. Updates to the template are provided with GitLab upgrades, allowing you to benefit from any improvements and additions.
Available templates:
-
Secret-Detection.gitlab-ci.yml: Stable version of the Secret Detection CI/CD template. -
Secret-Detection.latest.gitlab-ci.yml: Latest version of the Secret Detection template.
WARNING: The latest version of the template may include breaking changes. Use the stable template unless you need a feature provided only in the latest template.
For more information about template versioning, see the CI/CD documentation.
Enable Secret Detection
Prerequisites:
- Linux-based GitLab Runner with the
dockerorkubernetesexecutor. If you're using the shared runners on GitLab.com, this is enabled by default.- Windows Runners are not supported.
- CPU architectures other than amd64 are not supported.
- If you use your own runners, make sure the Docker version installed is not
19.03.0. See troubleshooting information for details. - GitLab CI/CD configuration (
.gitlab-ci.yml) must include theteststage.
To enable Secret Detection, either:
-
Enable Auto DevOps, which includes Auto Secret Detection.
-
Edit the
.gitlab.ci.ymlfile manually. Use this method if your.gitlab-ci.ymlfile is complex.
Edit the .gitlab-ci.yml file manually
This method requires you to manually edit the existing .gitlab-ci.yml file. Use this method if
your GitLab CI/CD configuration file is complex.
-
On the top bar, select Main menu > Projects and find your project.
-
On the left sidebar, select CI/CD > Editor.
-
Copy and paste the following to the bottom of the
.gitlab-ci.ymlfile:include: - template: Jobs/Secret-Detection.gitlab-ci.yml -
Select the Validate tab, then select Validate pipeline. The message Simulation completed successfully indicates the file is valid.
-
Select the Edit tab.
-
Optional. In the Commit message text box, customize the commit message.
-
In the Branch text box, enter the name of the default branch.
-
Select Commit changes.
Pipelines now include a Secret Detection job.
Use an automatically configured merge request
- Introduced in GitLab 13.11, deployed behind a feature flag, enabled by default.
- Feature flag removed in GitLab 14.1.
This method automatically prepares a merge request, with the Secret Detection template included in
the .gitlab-ci.yml file. You then merge the merge request to enable Secret Detection.
NOTE:
This method works best with no existing .gitlab-ci.yml file, or with a minimal configuration
file. If you have a complex GitLab configuration file it may not be parsed successfully, and an
error may occur. In that case, use the manual method instead.
To enable Secret Detection:
- On the top bar, select Main menu > Projects and find your project.
- On the left sidebar, select Security and Compliance > Security configuration.
- In the Secret Detection row, select Configure with a merge request.
- Optional. Complete the fields.
- Select Create merge request.
- Review and merge the merge request.
Pipelines now include a Secret Detection job.
Responding to a leaked secret
When a secret is detected, you should rotate it immediately. GitLab attempts to automatically revoke some types of leaked secrets. For those that are not automatically revoked, you must do so manually.
Purging a secret from the repository's history does not fully address the leak. The original secret remains in any existing forks or clones of the repository.
Pinning to specific analyzer version
The GitLab-managed CI/CD template specifies a major version and automatically pulls the latest analyzer release within that major version.
In some cases, you may need to use a specific version. For example, you might need to avoid a regression in a later release.
To override the automatic update behavior, set the SECRETS_ANALYZER_VERSION CI/CD variable
in your CI/CD configuration file after you include the Secret-Detection.gitlab-ci.yml template.
You can set the tag to:
- A major version, like
4. Your pipelines use any minor or patch updates that are released within this major version. - A minor version, like
4.5. Your pipelines use any patch updates that are released within this minor version. - A patch version, like
4.5.0. Your pipelines don't receive any updates.
This example uses a specific minor version of the analyzer:
include:
  - template: Security/Secret-Detection.gitlab-ci.yml

secret_detection:
  variables:
    SECRETS_ANALYZER_VERSION: "4.5"
Configure scan settings
The Secret Detection scan settings can be changed through CI/CD variables
by using the variables parameter in .gitlab-ci.yml.
WARNING: All configuration of GitLab security scanning tools should be tested in a merge request before merging these changes to the default branch. Failure to do so can give unexpected results, including a large number of false positives.
To override a job definition, (for example, change properties like variables or dependencies),
declare a job with the same name as the secret detection job to override. Place this new job after
the template inclusion and specify any additional keys under it.
In the following example extract of a .gitlab-ci.yml file:
- The Secret Detection template is included.
- In the
secret_detectionjob, the CI/CD variableSECRET_DETECTION_HISTORIC_SCANis set totrue. Because the template is evaluated before the pipeline configuration, the last mention of the variable takes precedence.
include:
  - template: Security/Secret-Detection.gitlab-ci.yml

secret_detection:
  variables:
    SECRET_DETECTION_HISTORIC_SCAN: "true"
Ignore secrets
In some instances, you might want to ignore a secret. For example, you may have a fake secret in an example or a test suite. In these instances, you want to ignore the secret, instead of having it reported as a vulnerability.
To ignore a secret, add gitleaks:allow as a comment to the line that contains the secret.
For example:
"A personal token for GitLab will look like glpat-JUST20LETTERSANDNUMB" #gitleaks:allowAvailable CI/CD variables
Secret Detection can be customized by defining available CI/CD variables:
| CI/CD variable | Default value | Description |
|---|---|---|
SECRET_DETECTION_EXCLUDED_PATHS |
"" | Exclude vulnerabilities from output based on the paths. The paths are a comma-separated list of patterns. Patterns can be globs (see doublestar.Match for supported patterns), or file or folder paths (for example, doc,spec ). Parent directories also match patterns. Introduced in GitLab 13.3. |
SECRET_DETECTION_HISTORIC_SCAN |
false | Flag to enable a historic Gitleaks scan. |
SECRET_DETECTION_IMAGE_SUFFIX |
"" | Suffix added to the image name. If set to -fips, FIPS-enabled images are used for scan. See Use FIPS-enabled images for more details. Introduced in GitLab 14.10. |
SECRET_DETECTION_LOG_OPTIONS |
"" |
git log options used to define commit ranges. Introduced in GitLab 15.1. |
In previous GitLab versions, the following variables were also available:
| CI/CD variable | Default value | Description |
|---|---|---|
SECRET_DETECTION_COMMIT_FROM |
- | The commit a Gitleaks scan starts at. Removed in GitLab 13.5. Replaced with SECRET_DETECTION_COMMITS. |
SECRET_DETECTION_COMMIT_TO |
- | The commit a Gitleaks scan ends at. Removed in GitLab 13.5. Replaced with SECRET_DETECTION_COMMITS. |
SECRET_DETECTION_COMMITS |
- | The list of commits that Gitleaks should scan. Introduced in GitLab 13.5. Removed in GitLab 15.0. |
Use FIPS-enabled images
Introduced in GitLab 14.10.
The default scanner images are built off a base Alpine image for size and maintainability. GitLab offers Red Hat UBI versions of the images that are FIPS-enabled.
To use the FIPS-enabled images, either:
- Set the
SECRET_DETECTION_IMAGE_SUFFIXCI/CD variable to-fips. - Add the
-fipsextension to the default image name.
For example:
variables:
  SECRET_DETECTION_IMAGE_SUFFIX: '-fips'

include:
  - template: Security/Secret-Detection.gitlab-ci.yml
Full history Secret Detection
By default, Secret Detection scans only the current state of the Git repository. Any secrets contained in the repository's history are not detected. To address this, Secret Detection can scan the Git repository's full history.
You should do a full history scan only once, after enabling Secret Detection. A full history can take a long time, especially for larger repositories with lengthy Git histories. After completing an initial full history scan, use only standard Secret Detection as part of your pipeline.
Enable full history Secret Detection
To enable full history Secret Detection, set the variable SECRET_DETECTION_HISTORIC_SCAN to true in your .gitlab-ci.yml file.
Custom rulesets (ULTIMATE)
- Introduced in GitLab 13.5.
- Added support for passthrough chains. Expanded to include additional passthrough types of
file,git, andurlin GitLab 14.6.- Added support for overriding rules in GitLab 14.8.
You can customize the default Secret Detection rules provided with GitLab.
The following customization options can be used separately, or in combination:
Disable predefined analyzer rules
If there are specific Secret Detection rules that you don't want active, you can disable them.
To disable analyzer rules:
- Create a
.gitlabdirectory at the root of your project, if one doesn't already exist. - Create a custom ruleset file named
secret-detection-ruleset.tomlin the.gitlabdirectory, if one doesn't already exist. - Set the
disabledflag totruein the context of arulesetsection. - In one or more
ruleset.identifiersubsections, list the rules to disable. Everyruleset.identifiersection has:- A
typefield for the predefined rule identifier. - A
valuefield for the rule name.
- A
In the following example secret-detection-ruleset.toml file, the disabled rules are assigned to
secrets by matching the type and value of identifiers:
[secrets]
  [[secrets.ruleset]]
    disable = true
    [secrets.ruleset.identifier]
      type = "gitleaks_rule_id"
      value = "RSA private key"
Override predefined analyzer rules
If there are specific Secret Detection rules you want to customize, you can override them. For example, you might increase the severity of specific secrets.
To override rules:
- Create a
.gitlabdirectory at the root of your project, if one doesn't already exist. - Create a custom ruleset file named
secret-detection-ruleset.tomlin the.gitlabdirectory, if one doesn't already exist. - In one or more
ruleset.identifiersubsections, list the rules to override. Everyruleset.identifiersection has:- A
typefield for the predefined rule identifier. - A
valuefield for the rule name.
- A
- In the
ruleset.overridecontext of arulesetsection, provide the keys to override. Any combination of keys can be overridden. Valid keys are:- description
- message
- name
- severity (valid options are: Critical, High, Medium, Low, Unknown, Info)
In the following example secret-detection-ruleset.toml file, rules are matched by the type and
value of identifiers and then overridden:
[secrets]
  [[secrets.ruleset]]
    [secrets.ruleset.identifier]
      type = "gitleaks_rule_id"
      value = "RSA private key"
    [secrets.ruleset.override]
      description = "OVERRIDDEN description"
      message = "OVERRIDDEN message"
      name = "OVERRIDDEN name"
      severity = "Info"
Synthesize a custom configuration
You can use passthroughs to override the default Secret Detection ruleset. The
following passthrough types are supported by the secrets analyzer:
rawfile
To define a passthrough, add one of the following to the
secret-detection-ruleset.toml file:
-
Using an inline (
raw) value:[secrets] description = 'secrets custom rules configuration' [[secrets.passthrough]] type = "raw" target = "gitleaks.toml" value = """\ title = "gitleaks config" # add regexes to the regex table [[rules]] description = "Test for Raw Custom Rulesets" regex = '''Custom Raw Ruleset T[est]{3}''' """ -
Using an external
filecommitted to the current repository:[secrets] description = 'secrets custom rules configuration' [[secrets.passthrough]] type = "file" target = "gitleaks.toml" value = "config/gitleaks.toml"
For more information on the syntax of passthroughs, see the passthroughs section on the SAST customize rulesets page.
Running Secret Detection in an offline environment (PREMIUM SELF)
An offline environment has limited, restricted, or intermittent access to external resources through the internet. For self-managed GitLab instances in such an environment, Secret Detection requires some configuration changes. The instructions in this section must be completed together with the instructions detailed in offline environments.
Configure GitLab Runner
By default, a runner tries to pull Docker images from the GitLab container registry even if a local
copy is available. You should use this default setting, to ensure Docker images remain current.
However, if no network connectivity is available, you must change the default GitLab Runner
pull_policy variable.
Configure the GitLab Runner CI/CD variable pull_policy to
if-not-present.
Use local Secret Detection analyzer image
Use a local Secret Detection analyzer image if you want to obtain the image from a local Docker registry instead of the GitLab container registry.
Prerequisites:
- Importing Docker images into a local offline Docker registry depends on your network security policy. Consult your IT staff to find an accepted and approved process to import or temporarily access external resources.
-
Import the default Secret Detection analyzer image from
registry.gitlab.cominto your local Docker container registry:registry.gitlab.com/security-products/secrets:4The Secret Detection analyzer's image is periodically updated so you should periodically update the local copy.
-
Set the CI/CD variable
SECURE_ANALYZERS_PREFIXto the local Docker container registry.include: - template: Security/Secret-Detection.gitlab-ci.yml variables: SECURE_ANALYZERS_PREFIX: "localhost:5000/analyzers"
The Secret Detection job should now use the local copy of the Secret Detection analyzer Docker image, without requiring internet access.
Configure a custom Certificate Authority
To trust a custom Certificate Authority, set the ADDITIONAL_CA_CERT_BUNDLE variable to the bundle
of CA certificates that you trust. Do this either in the .gitlab-ci.yml file, in a file
variable, or as a CI/CD variable.
-
In the
.gitlab-ci.ymlfile, theADDITIONAL_CA_CERT_BUNDLEvalue must contain the text representation of the X.509 PEM public-key certificate.For example:
variables: ADDITIONAL_CA_CERT_BUNDLE: | -----BEGIN CERTIFICATE----- MIIGqTCCBJGgAwIBAgIQI7AVxxVwg2kch4d56XNdDjANBgkqhkiG9w0BAQsFADCB ... jWgmPqF3vUbZE0EyScetPJquRFRKIesyJuBFMAs= -----END CERTIFICATE----- -
If using a file variable, set the value of
ADDITIONAL_CA_CERT_BUNDLEto the path to the certificate. -
If using a variable, set the value of
ADDITIONAL_CA_CERT_BUNDLEto the text representation of the certificate.
Warnings for potential leaks in text content
Introduced in GitLab 15.11.
When you create an issue, propose a merge request, or write a comment, you might accidentally post a sensitive value. For example, you might paste in the details of an API request or an environment variable that contains an authentication token.
GitLab checks if the text of your issue description, merge request description, comment, or reply contains a sensitive token. If a token is found, a warning message is displayed. You can then edit your message before posting it. This check happens in your browser before the message is sent to the server. The check is always on; you don't have to set it up.
Your text is checked for the following secret types:
- GitLab personal access tokens
- GitLab feed tokens
This feature is separate from Secret Detection scanning, which checks your Git repository for leaked secrets. Issue 405147 tracks efforts to align these two types of protection.
Troubleshooting
Set the logging level
Introduced in GitLab 13.1.
Set the logging level to debug when you need diagnostic information in a Secret Detection job log.
WARNING: Debug logging can be a serious security risk. The output may contain the content of environment variables and other secrets available to the job. The output is uploaded to the GitLab server and visible in job logs.
- In the
.gitlab-ci.ymlfile, set theSECURE_LOG_LEVELCI/CD variable todebug. - Run the Secret Detection job.
- Analyze the content of the Secret Detection job.
- In the
.gitlab-ci.ymlfile, set theSECURE_LOG_LEVELCI/CD variable toinfo(default).
Warning: gl-secret-detection-report.json: no matching files
For information on this, see the general Application Security troubleshooting section.
Error: Couldn't run the gitleaks command: exit status 2
The Secret Detection analyzer relies on generating patches between commits to scan content for
secrets. If the number of commits in a merge request is greater than the value of the
GIT_DEPTH CI/CD variable, Secret
Detection fails to detect secrets.
For example, you could have a pipeline triggered from a merge request containing 60 commits and the
GIT_DEPTH variable set to less than 60. In that case the Secret Detection job fails because the
clone is not deep enough to contain all of the relevant commits. To verify the current value, see
pipeline configuration.
To confirm this as the cause of the error, set the logging level to
debug, then rerun the pipeline. The logs should look similar to the following example. The text
"object not found" is a symptom of this error.
ERRO[2020-11-18T18:05:52Z] object not found
[ERRO] [secrets] [2020-11-18T18:05:52Z] ▶ Couldn't run the gitleaks command: exit status 2
[ERRO] [secrets] [2020-11-18T18:05:52Z] ▶ Gitleaks analysis failed: exit status 2
To resolve the issue, set the GIT_DEPTH CI/CD variable
to a higher value. To apply this only to the Secret Detection job, the following can be added to
your .gitlab-ci.yml file:
secret_detection:
  variables:
    GIT_DEPTH: 100
Error: ERR fatal: ambiguous argument
Secret Detection can fail with the message ERR fatal: ambiguous argument error if your
repository's default branch is unrelated to the branch the job was triggered for. See issue
!352014 for more details.
To resolve the issue, make sure to correctly set your default branch
on your repository. You should set it to a branch that has related history with the branch you run
the secret-detection job on.
exec /bin/sh: exec format error message in job log
The GitLab Secret Detection analyzer only supports running on the amd64 CPU architecture.
This message indicates that the job is being run on a different architecture, such as arm.