DingTalk OAuth 2.0 OmniAuth provider (FREE SELF)
- Introduced in GitLab 14.5.
- Deprecated in GitLab 15.10.
You can sign in to GitLab using your DingTalk account. Sign in to DingTalk Open Platform and create an application on it. DingTalk generates a client ID and secret key for you to use.
-
Sign in to DingTalk Open Platform.
-
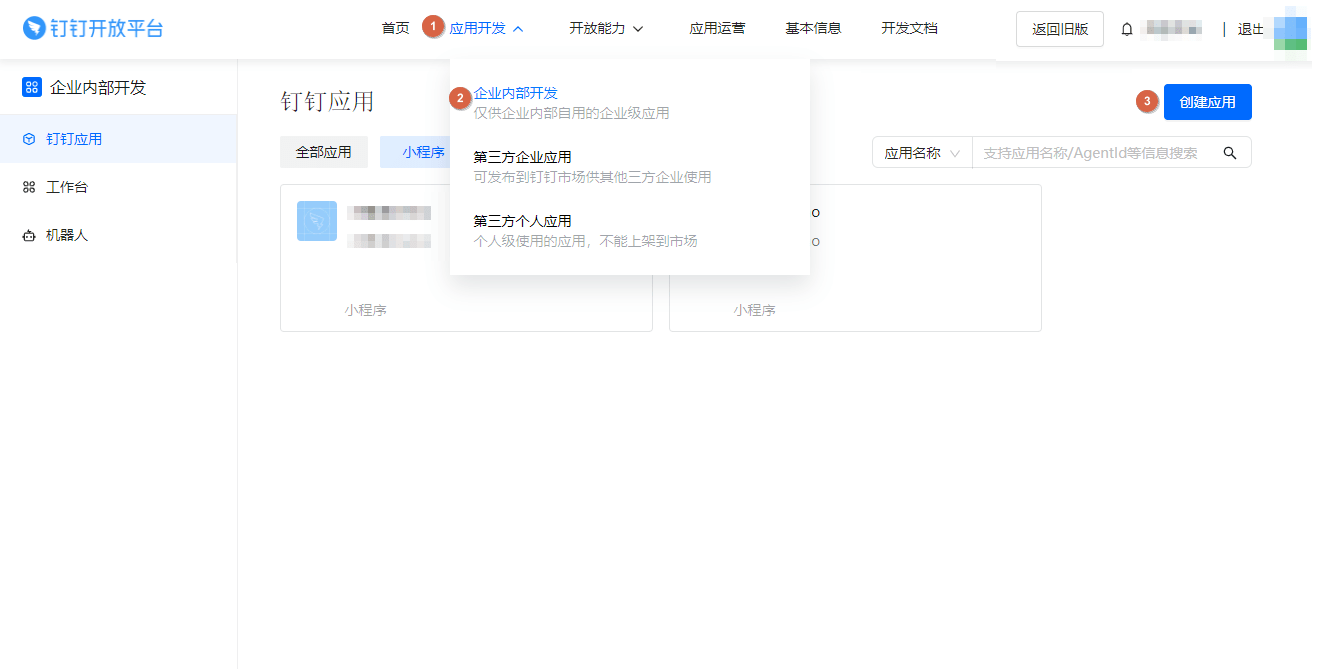
On the top bar, select Application development > Enterprise internal development and then select Create Application.

-
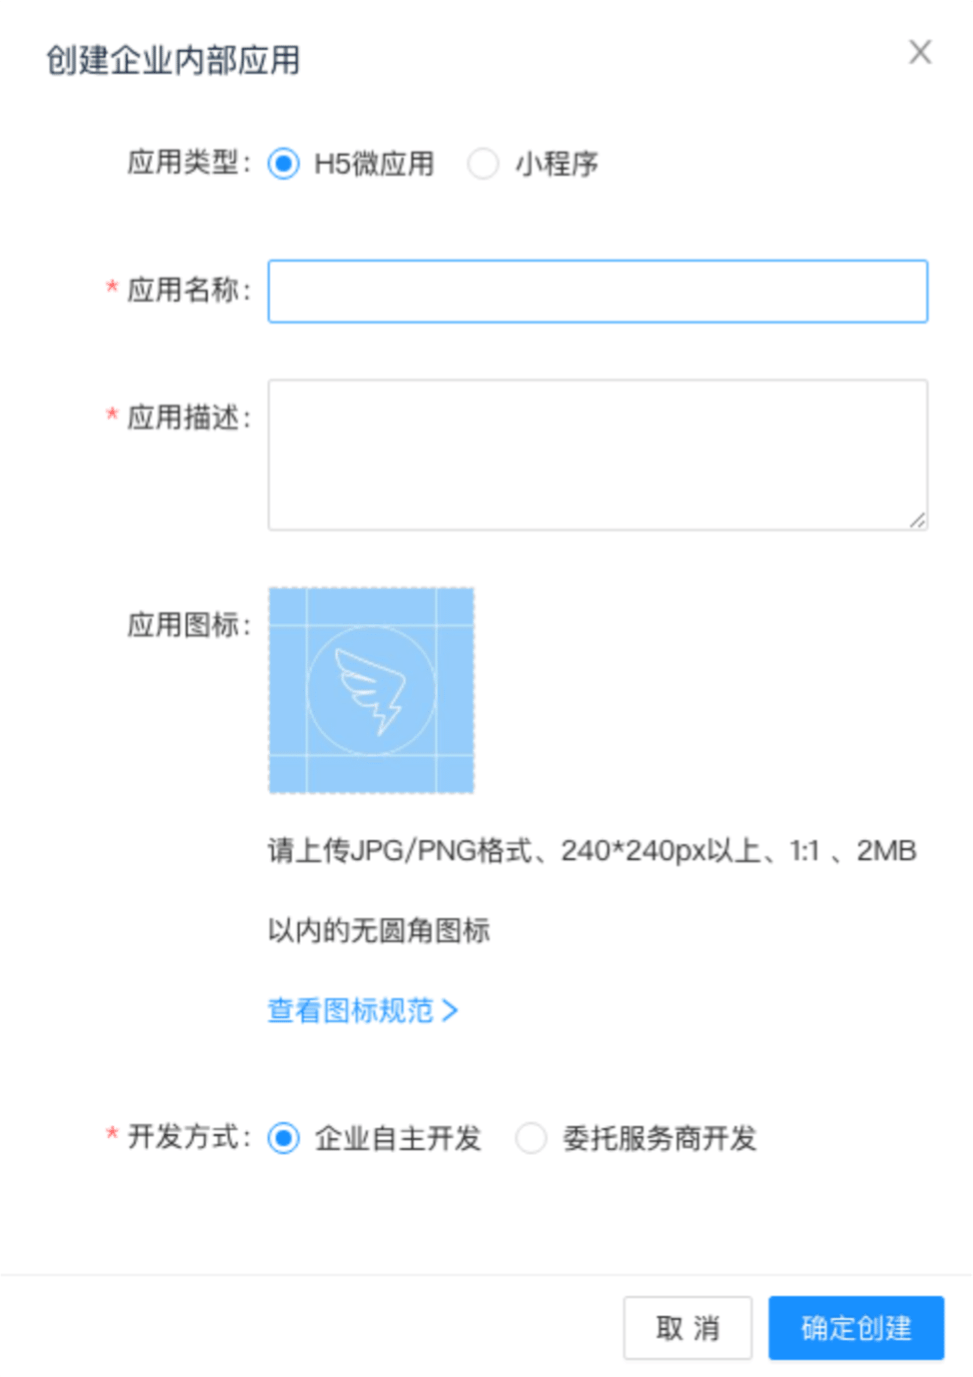
Fill in the application details:
-
Application Name: This can be anything. Consider something like
<Organization>'s GitLab,<Your Name>'s GitLab, or something else descriptive. - Application Description: Create a description.
- Application icon: Upload qualified icons if needed.
-
Application Name: This can be anything. Consider something like
-
Select Confirm and create.
-
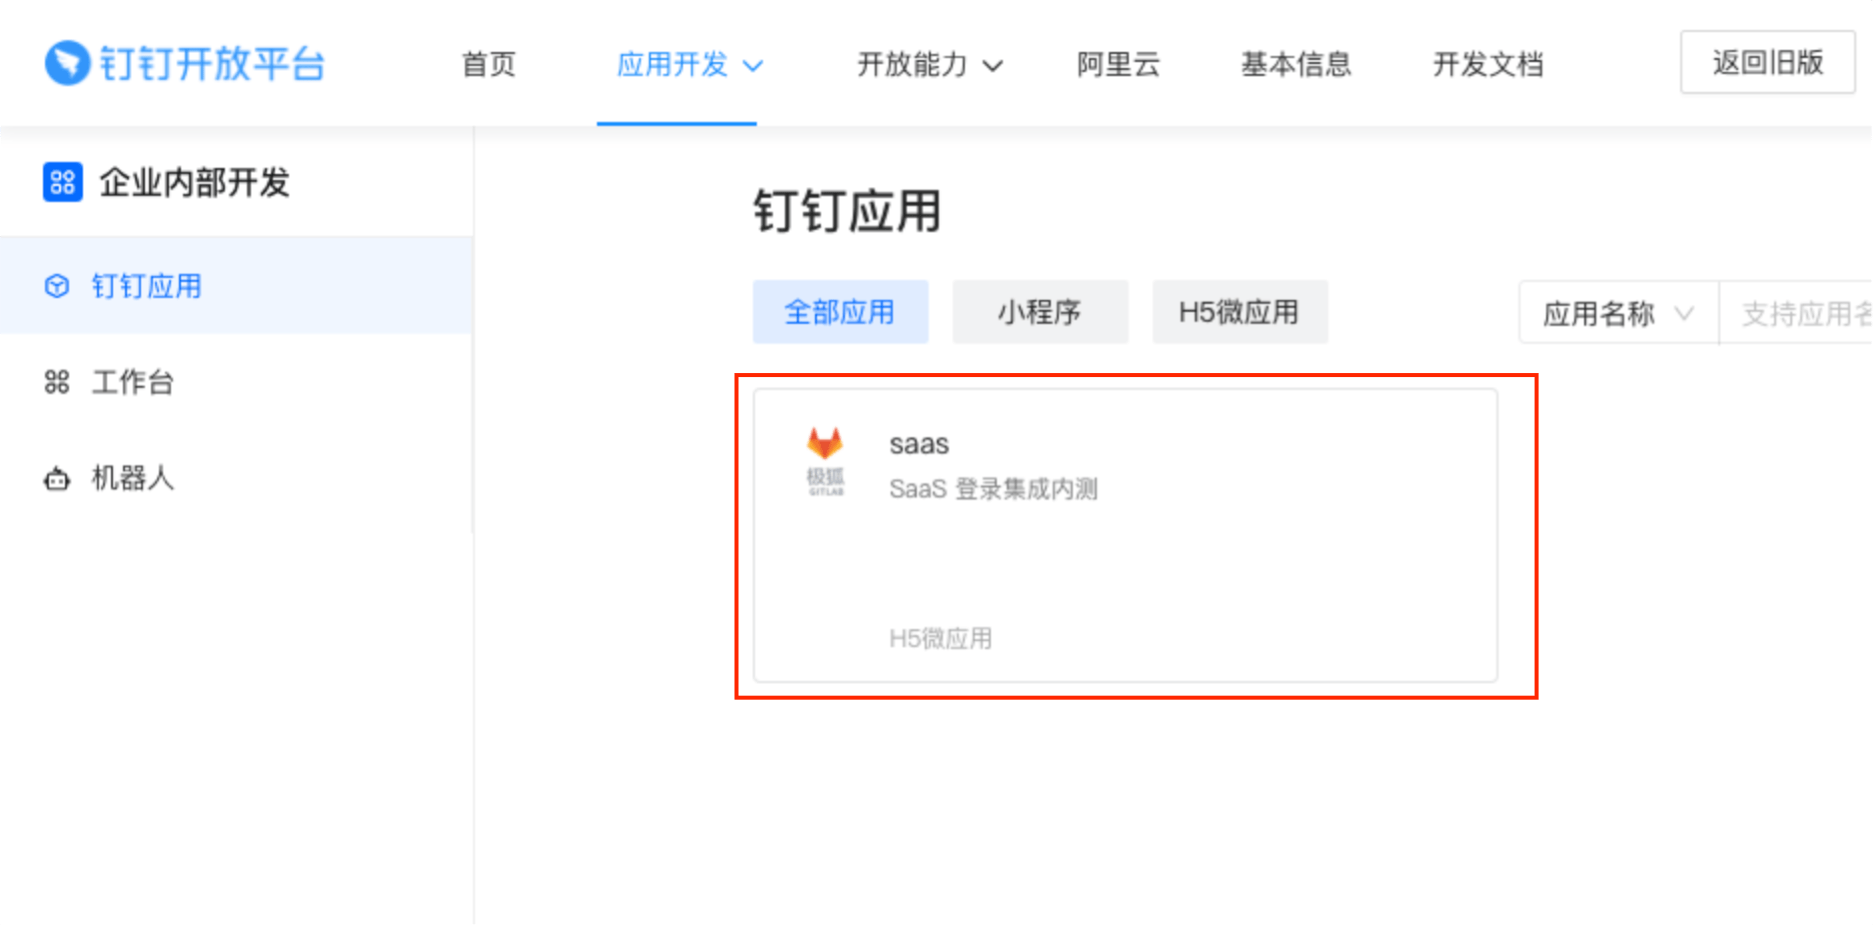
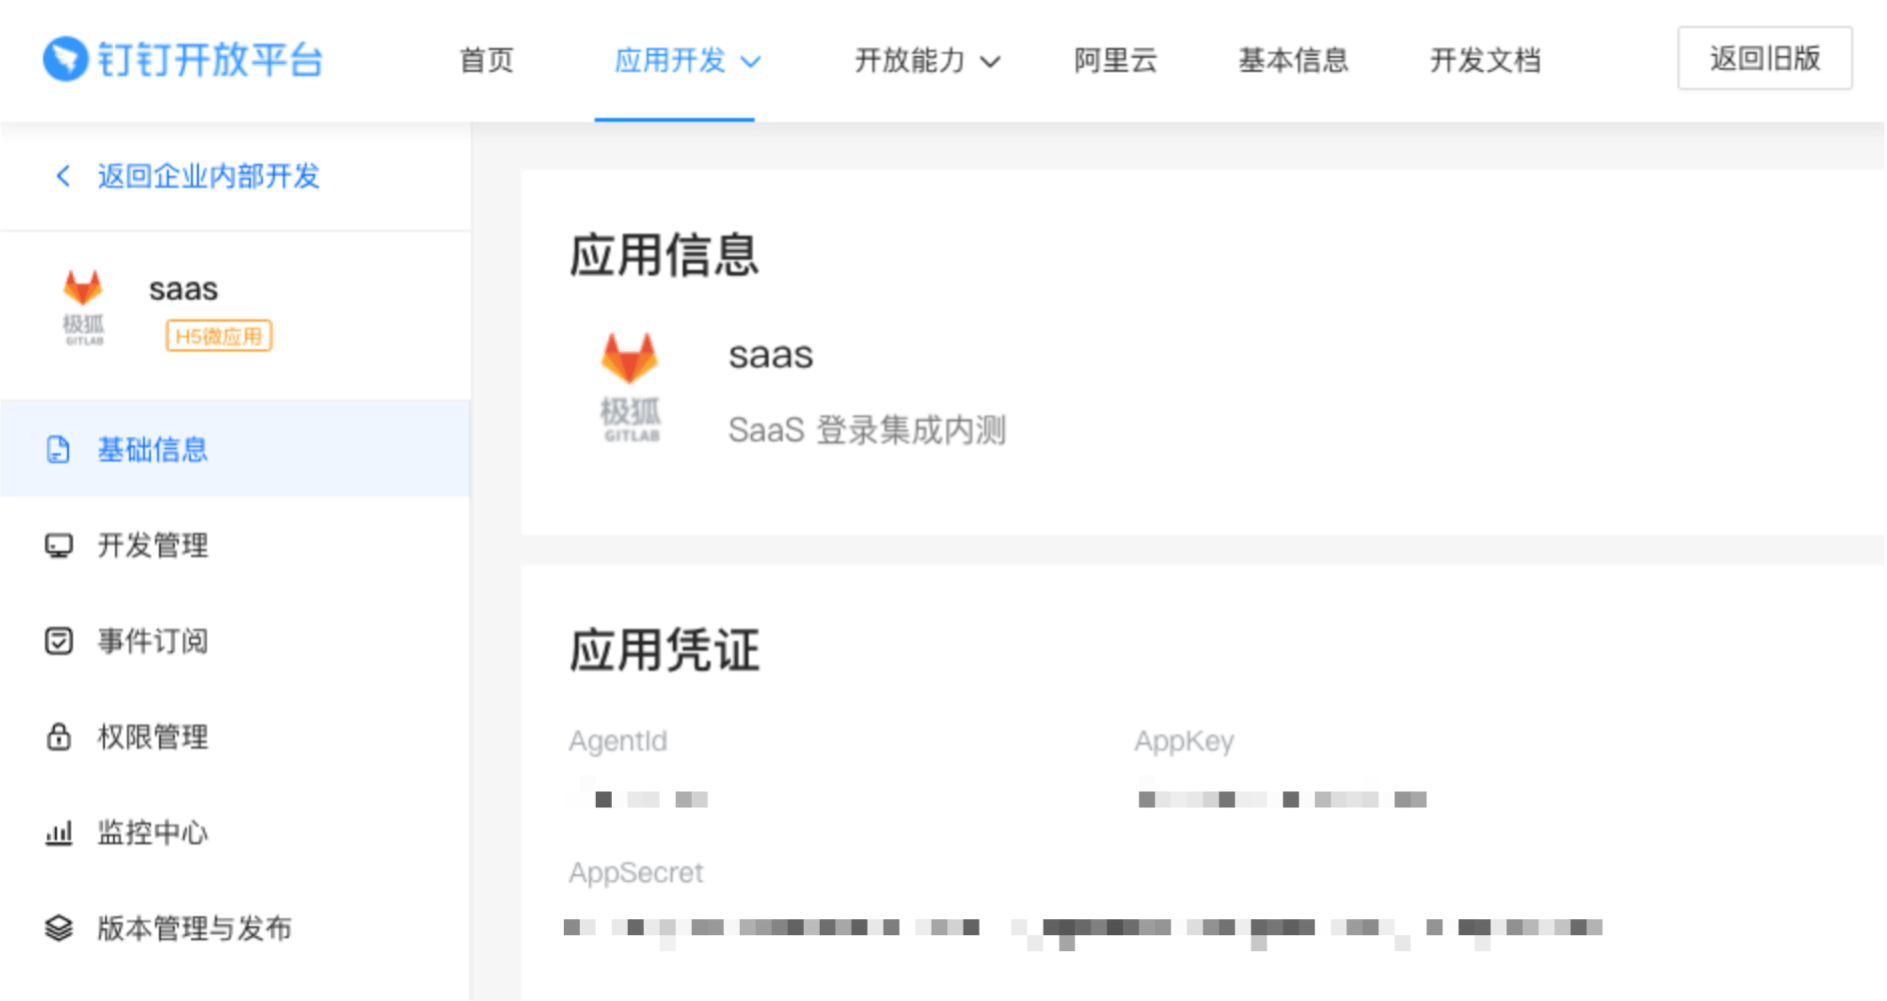
On the left sidebar, select DingTalk Application and find your application. Select it and go to the application information page.
-
In the Application Credentials section, note the AppKey and AppSecret as you use these values later.
-
On your GitLab server, open the configuration file.
For Omnibus package:
sudo editor /etc/gitlab/gitlab.rbFor installations from source:
cd /home/git/gitlab sudo -u git -H editor config/gitlab.yml -
Configure the common settings to add
dingtalkas a single sign-on provider. This enables Just-In-Time account provisioning for users who do not have an existing GitLab account. -
Add the provider configuration:
For Omnibus package:
  gitlab_rails['omniauth_providers'] = [
    {
      name: "dingtalk",
      # label: "Provider name", # optional label for login button, defaults to "Ding Talk"
      app_id: "<your_appkey>",
      app_secret: "<your_appsecret>"
    }
  ]
For installations from source:
- { name: 'dingtalk', # label: 'Provider name', # optional label for login button, defaults to "Ding Talk" app_id: '<your_appkey>', app_secret: '<your_appsecret>' } -
Replace
<your_appkey>with the AppKey from the Application Credentials in step 6. -
Replace
<your_appsecret>with the AppSecret from the Application Credentials in step 6. -
Save the configuration file.
-
For the changes to take effect, if you installed:
- Using Omnibus, reconfigure GitLab.
- From source, restart GitLab.